Darkroom notes from March 29
Progress! Finally!
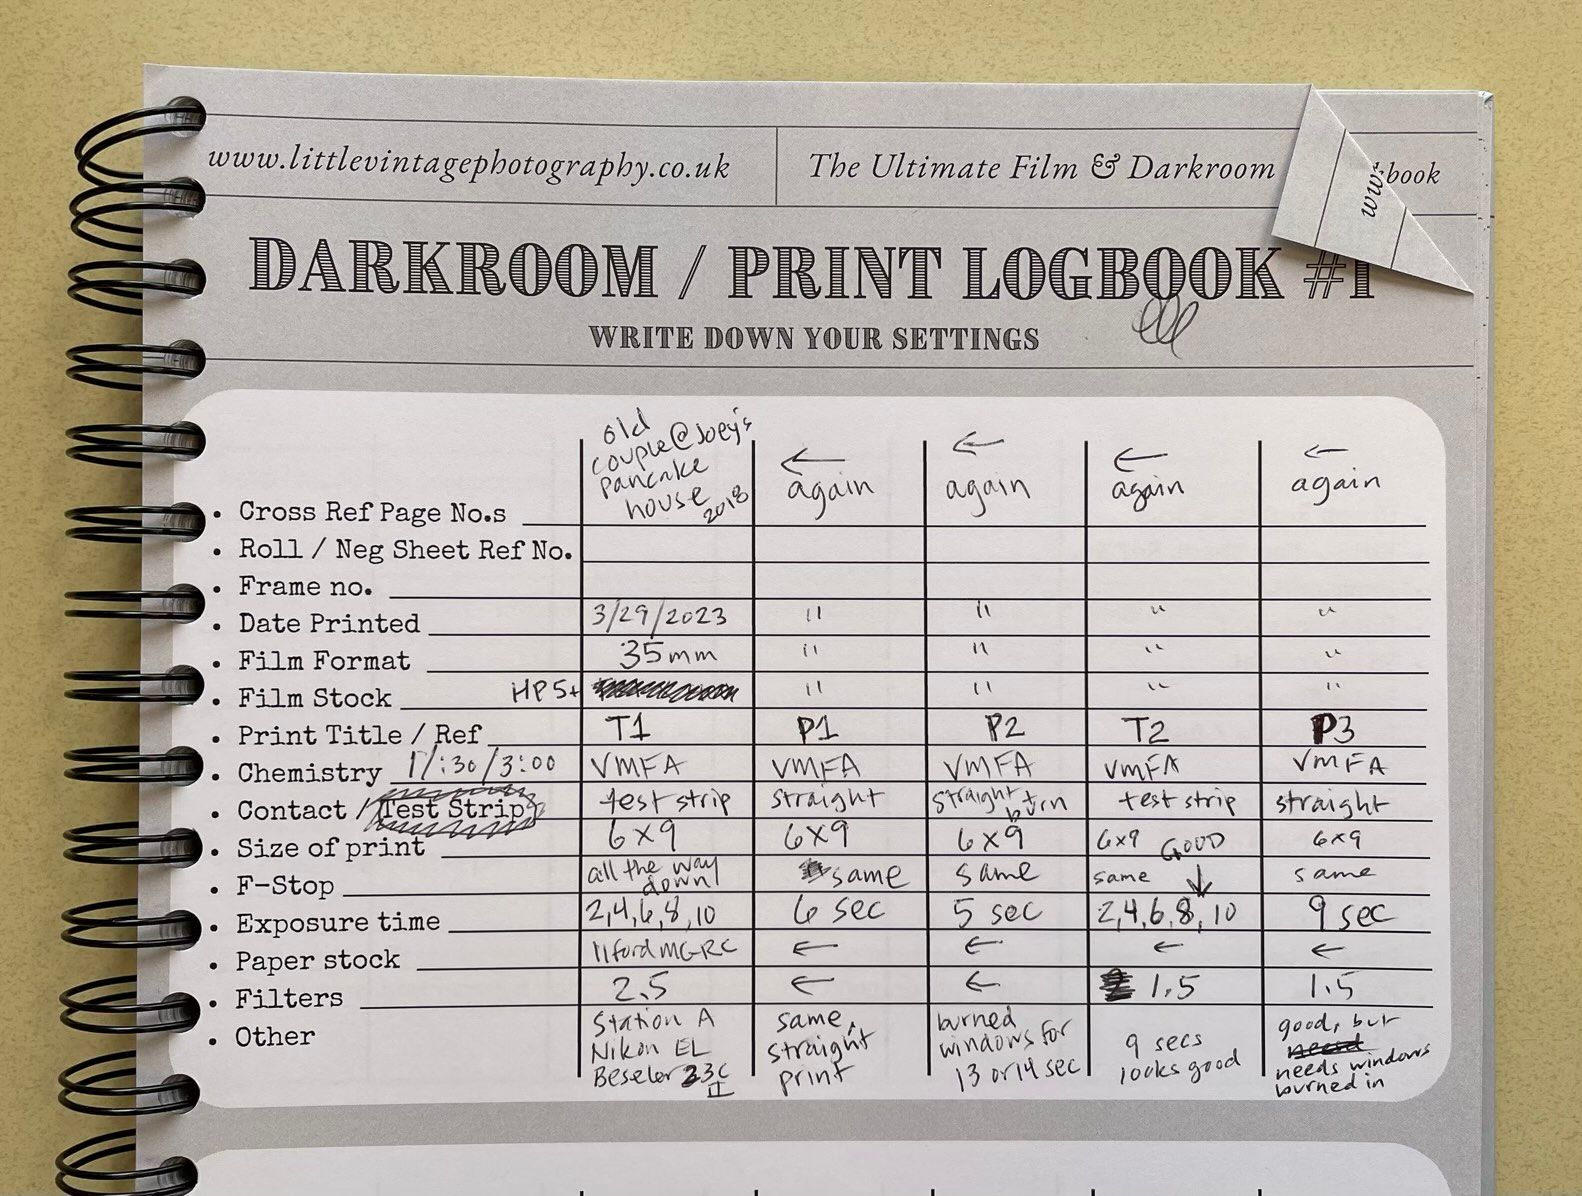
Thanks to The Ultimate Film & Darkroom Workbook by Rachel at Little Vintage Photography for the push in the right direction. I’d been resistant to taking any notes about what I was trying in the darkroom. I just wanted to work at a decent pace and try to nail at least one exposure by the end of the night. But you can’t always even accomplish one good print in a night. Sometimes you get close and need to pick up where you left off again in a week, and doing that from memory doesn’t work. It’s hard to remember what filter you used even two prints ago on the same night. This workbook’s tables give just enough of a prompt for details to make it worth doing. After taking good notes this past Wednesday night, I’m a convert. Can’t imagine going back to trying to keep what worked/didn’t in my head. Here’s what I learned.
- Don’t put your negative in the carrier right side up. Put it with the top of the image on the bottom, so that when you project onto the paper, you’re not looking at an upside down image. (This only took me about 6 weeks to internalize.)
- Use a clean grain focuser that magnifies a lot. It makes everything easier and faster. I just bought a used Bestwell Minisight grain focuser which I suppose is only a 10x magnifier, but it’s much better than the one we had in class that was too dirty to use.
- If you have to cover the lens with your hand to get accurate times, don’t cup your hand right over the lens because you’ll fog it up. It’s enough to hold your hand a couple of inches below the lens at the point where you can see the whole image in your hand and none of it hits the paper.
- After changing filters, resist the urge to guess at the exposure time and make a new straight print. It’s going to be different than what it was with the last filter. Just accept that you have to make a new giant test strip to see what you have.
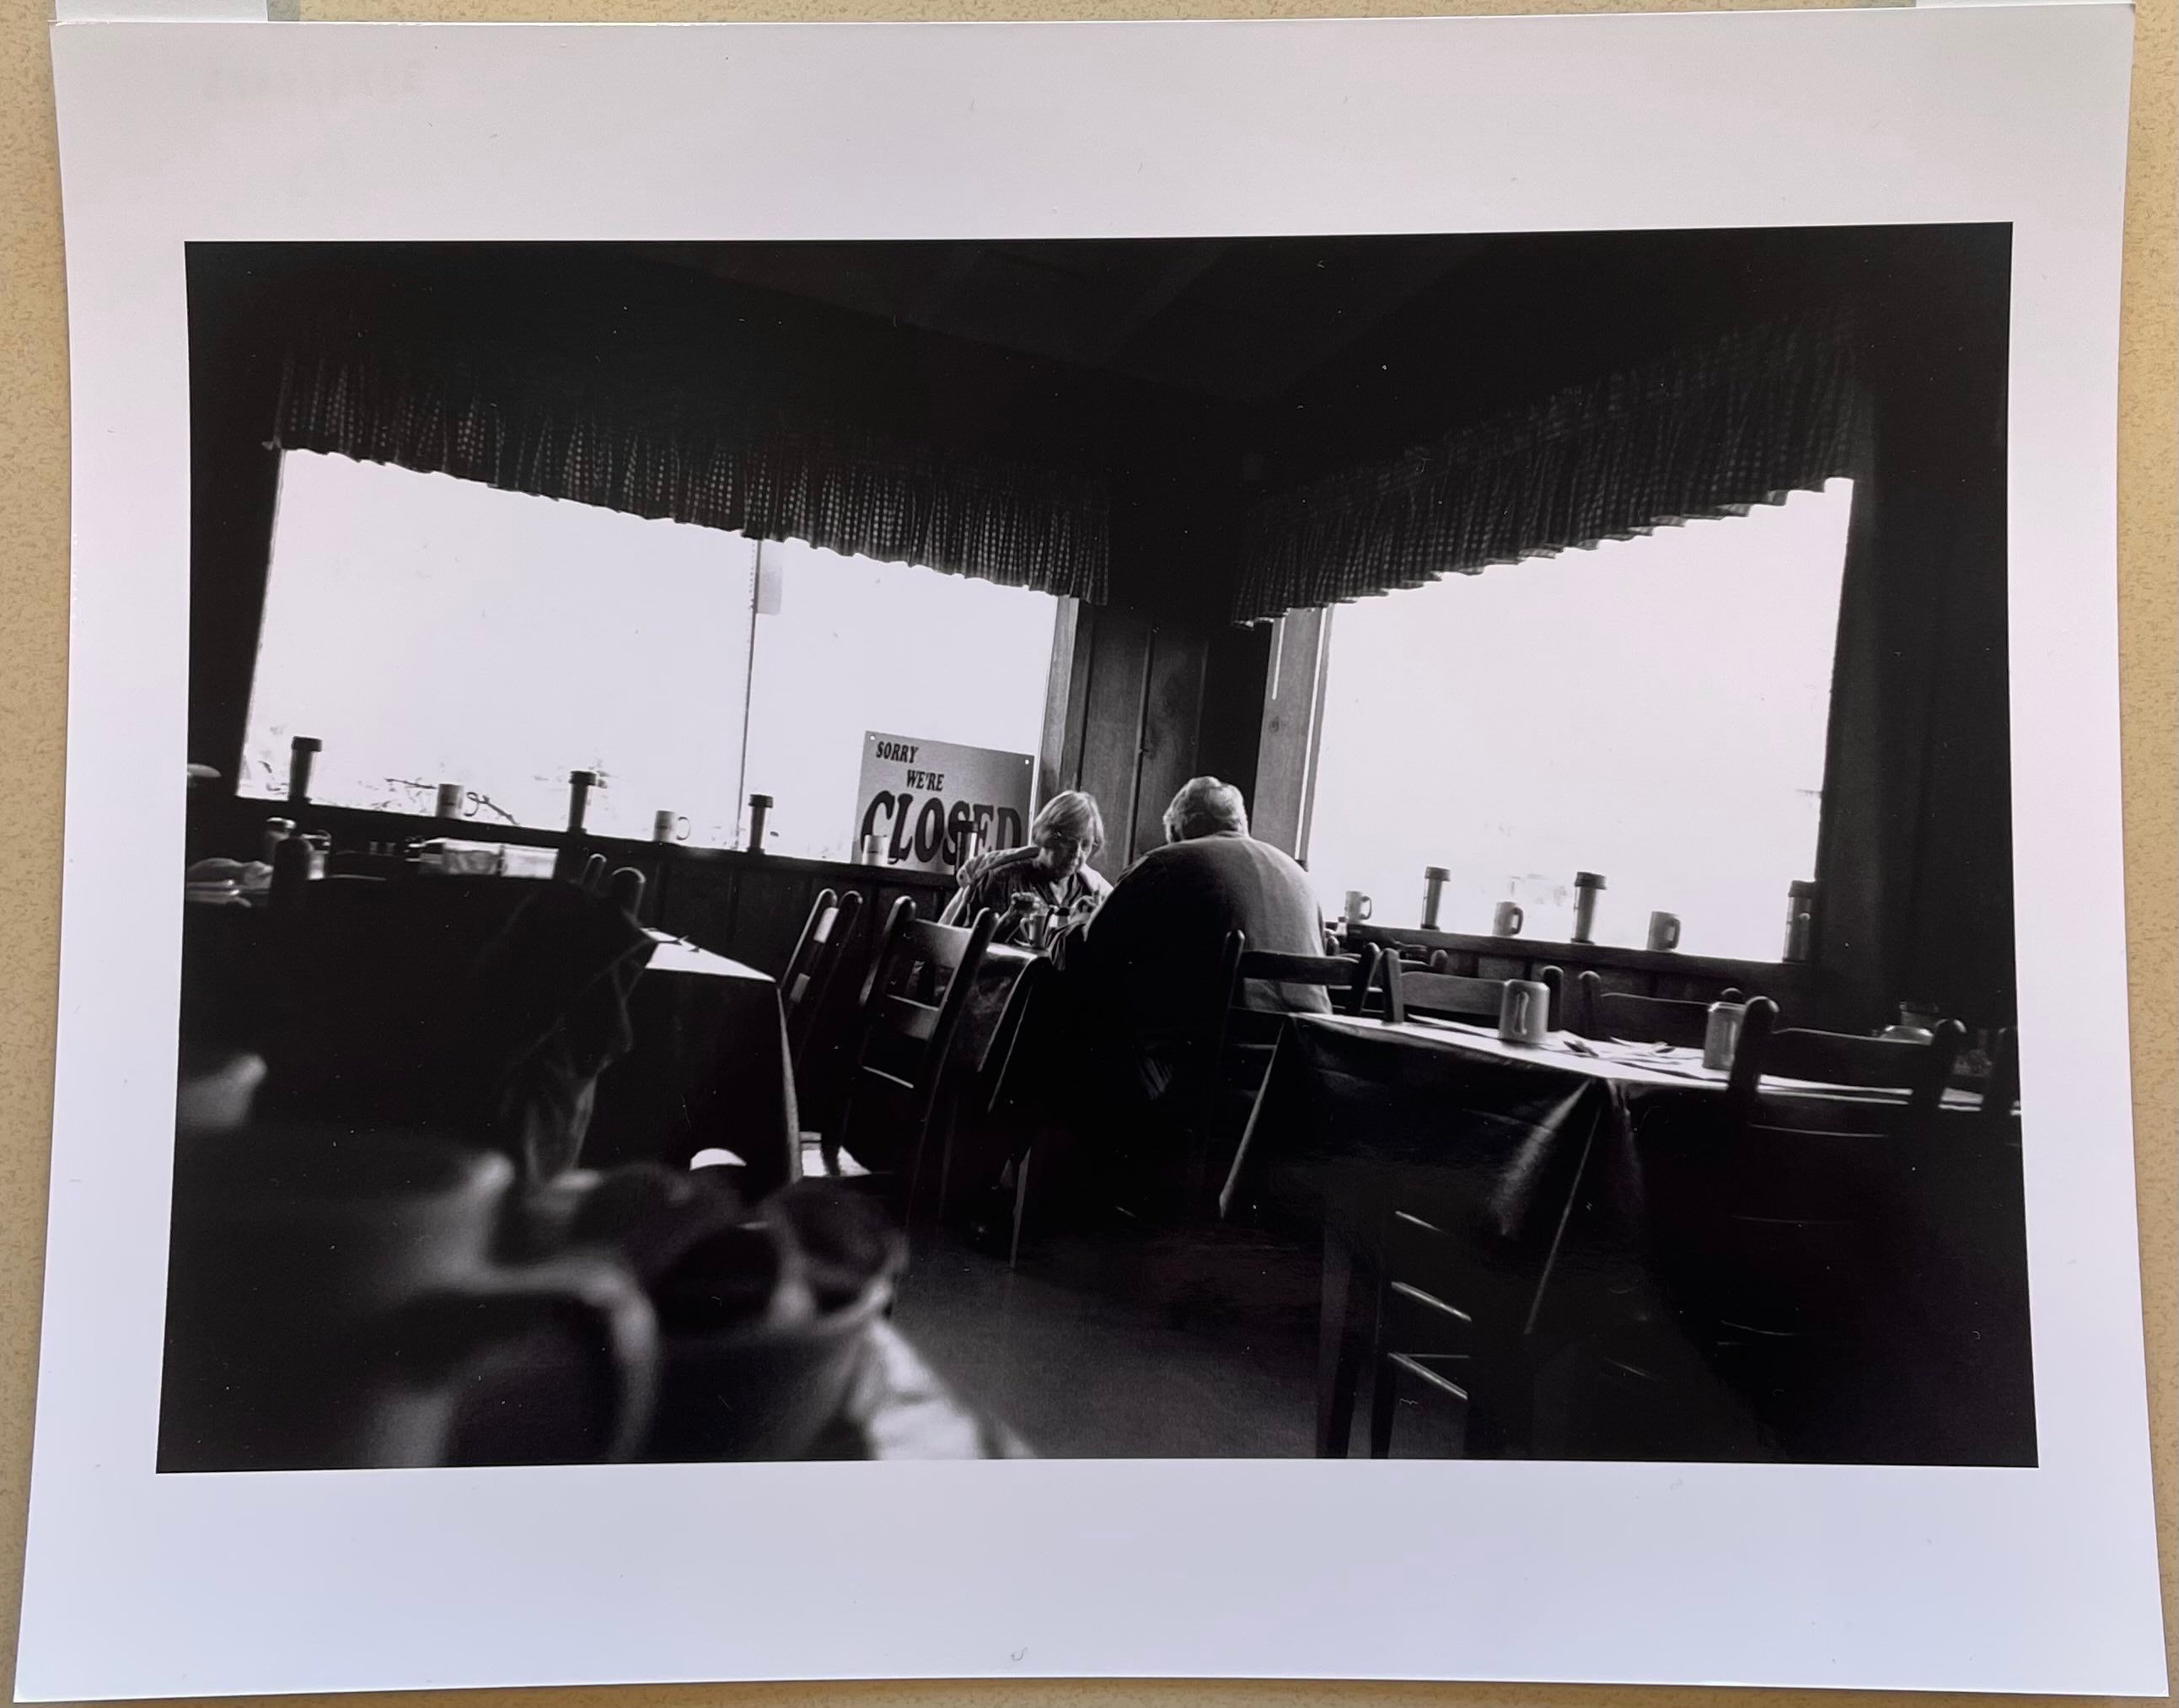
- Fully fix and wash your test strips and keep them, and log their details along with the full prints. On the back of the prints, I use ballpoint pen to gently write the date and “T1” and “P1” for the first test strip and first full print. You can refer to these later to see what different filters and times will do.
- After you’ve picked a target exposure time from that strip, make a straight working print from that, without dodging or burning. Just do it and see what that does to the highlights and shadows in your image.
- Take the time to log your details while your prints are fixing and washing. You can do this with a dark pen and the light from your safelight. It takes only a couple of minutes and it pays off.
Only problem now is that it’s our instructor’s spring break and we don’t have class this week.