Capture One 23 Pro and Fujifilm X100T experiments
After not touching Capture One in over nine months, it seemed like a good time to dip back in. I’m still a subscriber to one of their plans (it’s hard to know which one), but whatever I’m on allowed me to upgrade to v23 (confusingly also known as Build 16.2.5.9). I hate to admit it, but I’m going to need to keep C1 around just because it still deals with X-Trans sensor files better than both Lightroom Classic and Lightroom (CC).
Here’s what I’m trying today for color RAW (.RAF) files from the Fujifilm X100T, and it seems to work:
- Import with no adjustments
- Auto-adjust (limited to: White Balance, Exposure, Contrast and Brightness, and Levels)
- Apply one of these two Digistock Imperfect Kodachrome Pack filters, depending on the look you like and what the available light was:
- Grain: K25B - Classic
- Grain: K64B - Classic
I went back and forth on whether to use the Clean vs. Grain styles. I ended up going with the Grain versions because when I can’t help myself and I pixel-peep, Digistock’s formula for grain (and what C1 makes possible for grain in general) does something that results in more than just “adding grain”. I don’t know what it is, and I know it’s not real, but I like it.
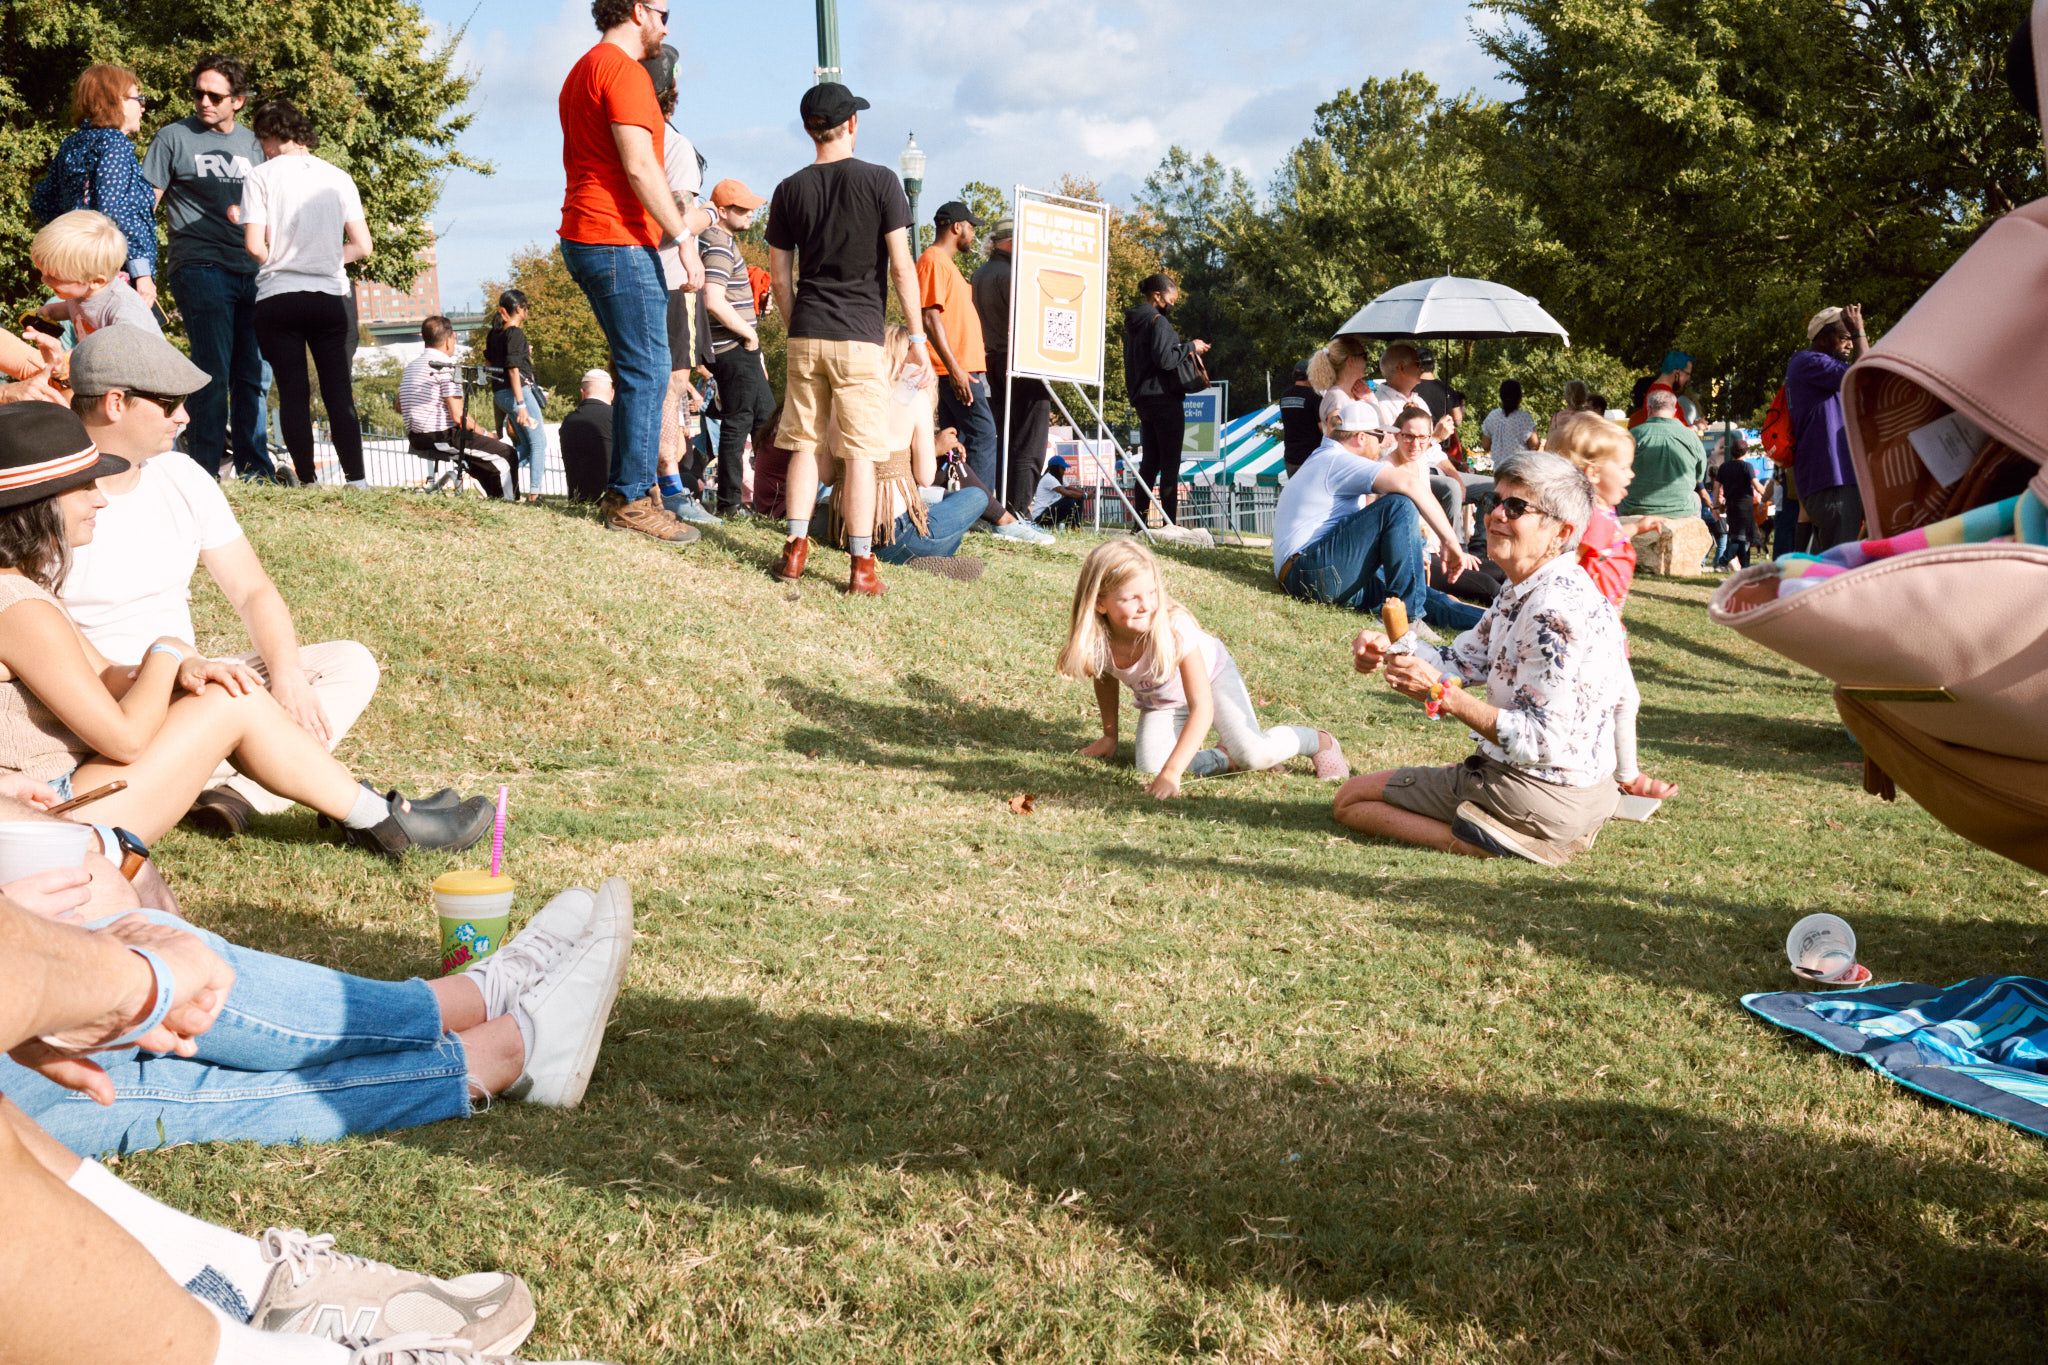
Here’s the original Classic Chrome JPEG from the X100T. Overexposed, with unrecoverable highlights. I couldn’t save it:
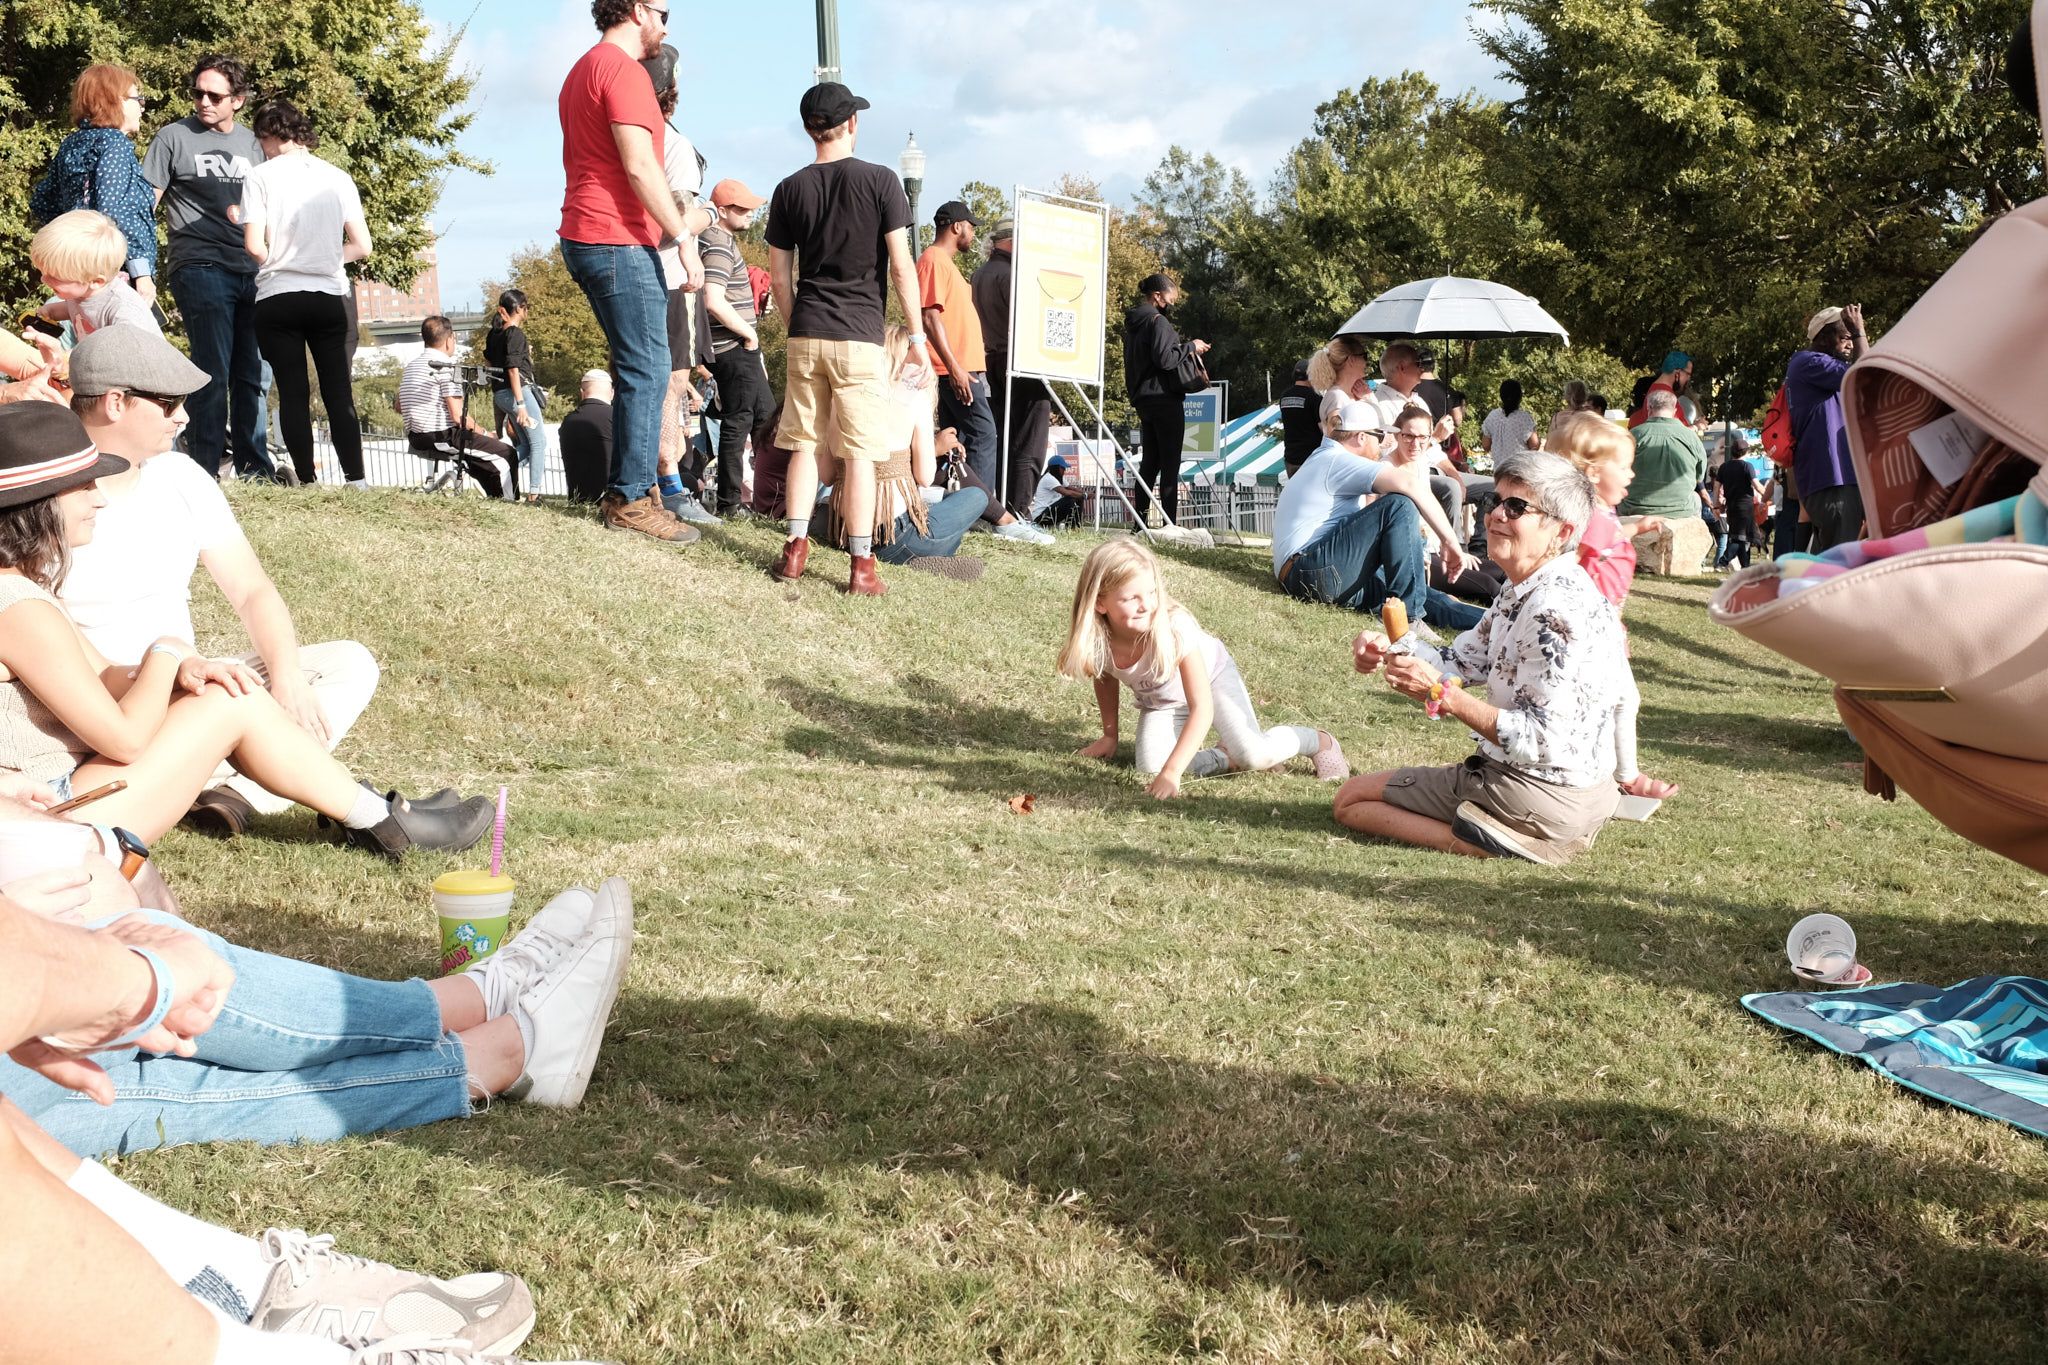
Unprocessed RAW file. Too intense and green. Hard on the eyes:
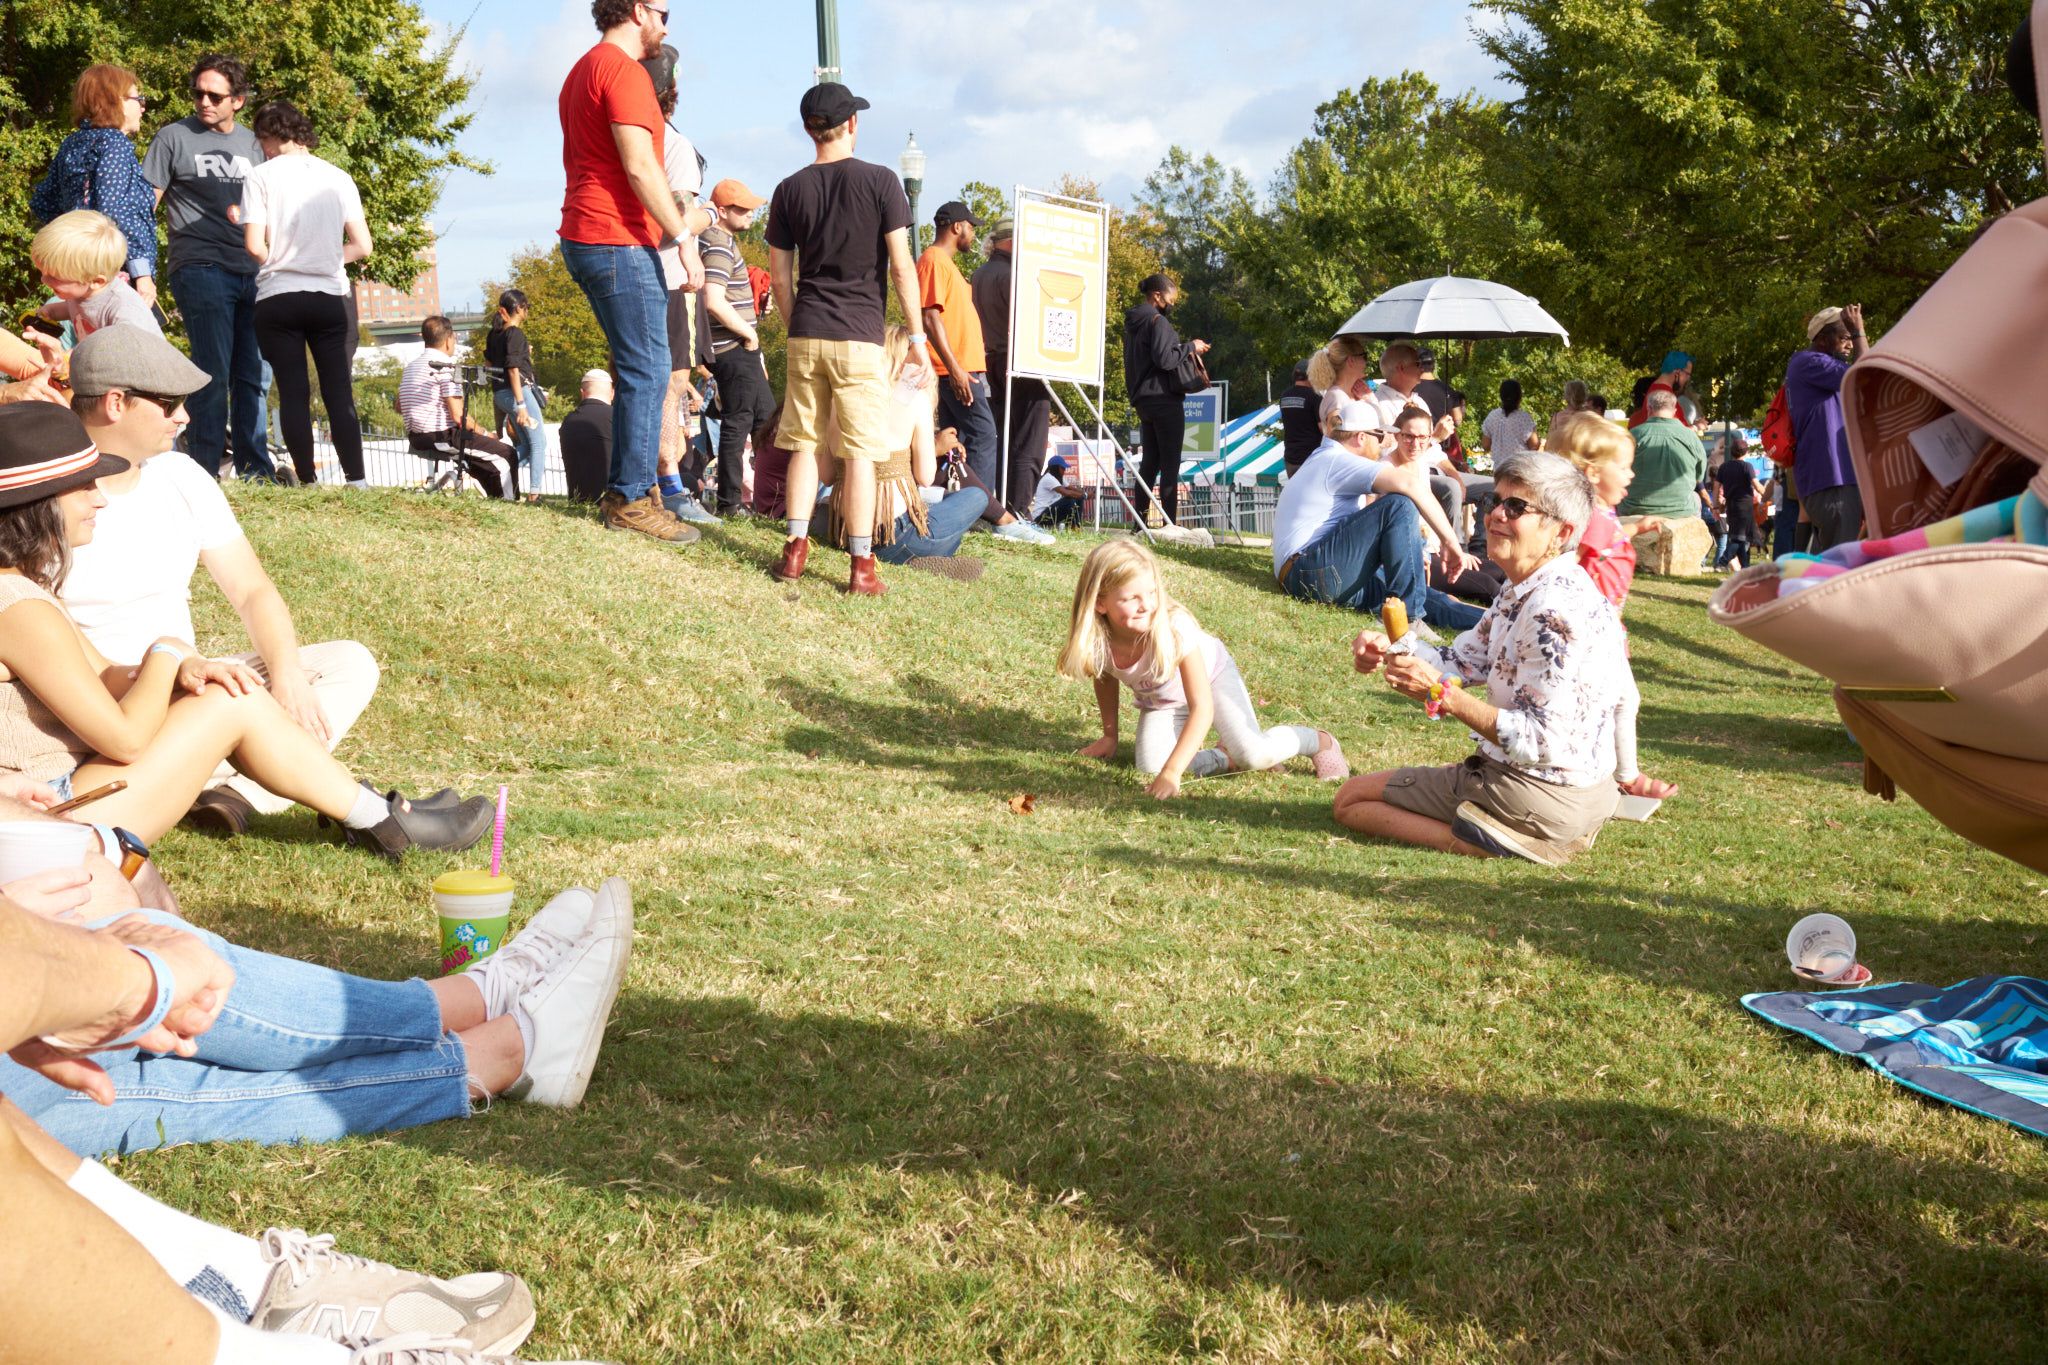
Auto-adjust > Grain: K25B - Classic. Now we’re getting somewhere:
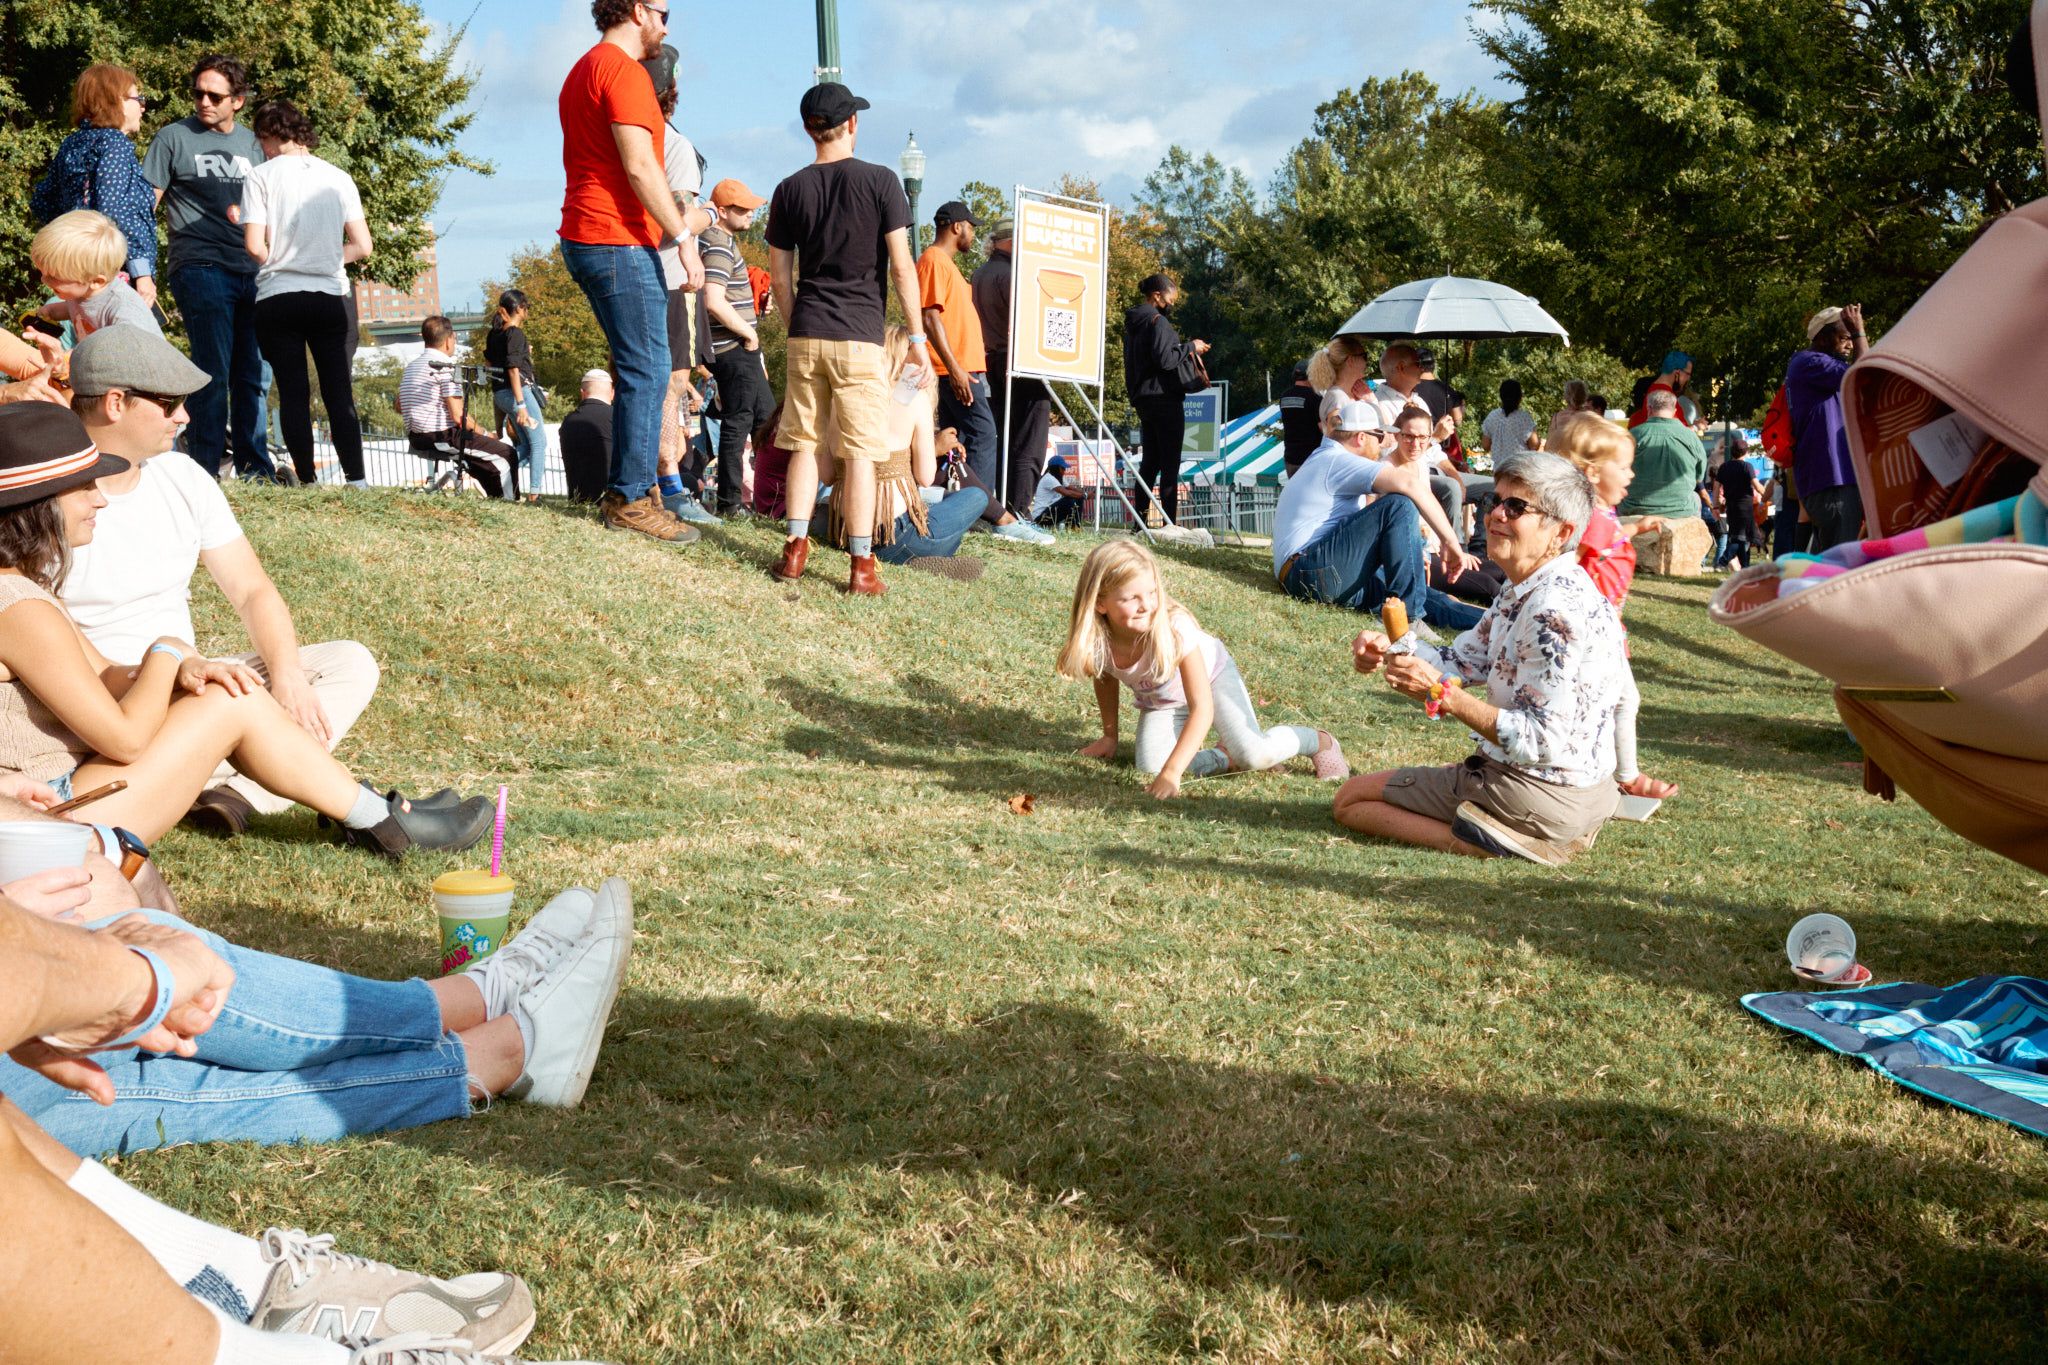
Auto-adjust > Grain: K64B - Classic. This is very close to Fujifilm’s Classic Chrome look, when everything works right: